
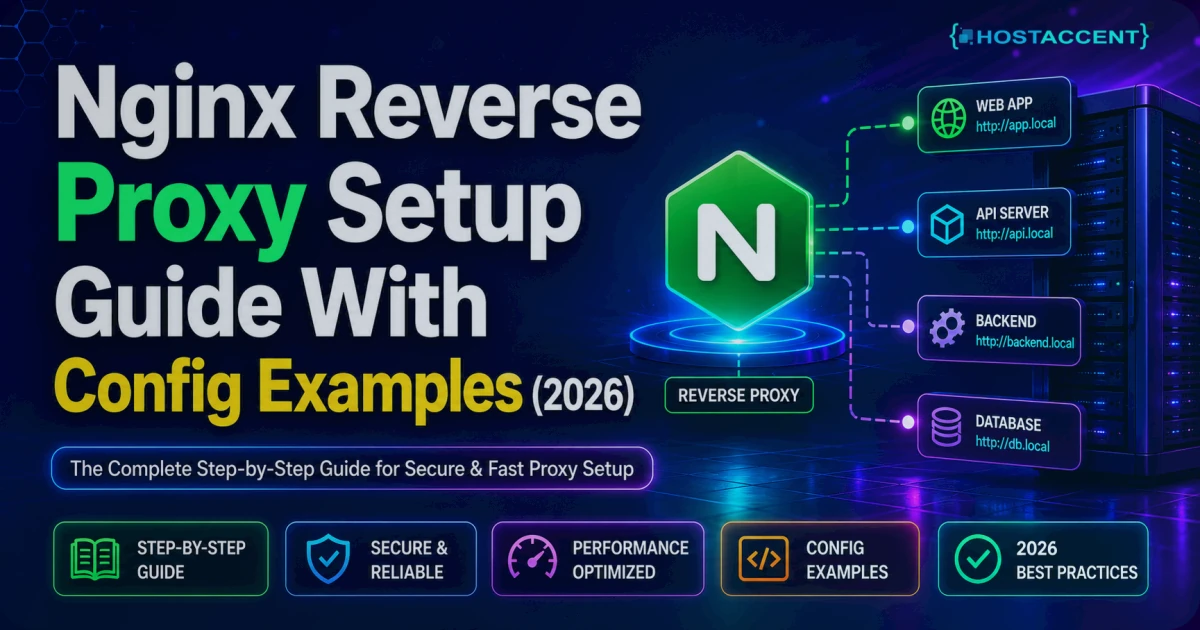
You've got an app running happily on localhost:3000 — and no clean way to put it on the internet. That's exactly the problem an Nginx reverse proxy solves. It sits in front of your backend apps, accepts all traffic on ports 80 and 443, and quietly routes each request to the right place.
Quick Answer: An Nginx reverse proxy forwards incoming requests to a backend service using the
proxy_passdirective. You create a server block, pointproxy_passat your app's local address (for examplehttp://127.0.0.1:3000), forward the original Host and client IP withproxy_set_header, then runnginx -tand reload. A basic working setup takes about 10 minutes on a fresh VPS.
This isn't theory for us, either. Every page you're reading right now passes through this exact architecture — a host like Hostaccent runs Nginx in front of Apache in production, so the configs below are the patterns we use daily, plus the mistakes we keep fixing in customer tickets. Copy, paste, change three lines, and you're live.
What Is an Nginx Reverse Proxy (and Why Use One)?
A reverse proxy is a server that receives requests on behalf of other servers. Clients never talk to your app directly — they talk to Nginx, and Nginx talks to the app over a private connection (usually localhost or an internal network).
Why bother? Four practical reasons:
- One entry point. Ports 80 and 443 stay the only open web ports. Your apps on 3000, 8000, or 8080 remain firewalled off from the public internet.
- SSL in one place. Nginx terminates HTTPS once, so every backend app gets encryption without ever touching a certificate.
- Multiple apps on one server. Route
app1.example.comto one process andapp2.example.comto another — one VPS, many projects. - Buffering and caching. Nginx absorbs slow clients and can cache responses, freeing your app to do actual work. A bare Nginx install idles at under 20 MB of RAM, so this protection costs almost nothing.
If you want the deeper theory first, Cloudflare's reverse proxy explainer is a solid primer. The rest of this guide is hands-on.
Reverse Proxy vs Forward Proxy
The naming trips people up constantly, so let's settle it. In the reverse proxy vs forward proxy question, the difference is who is being represented. A forward proxy sits in front of clients — it hides users from the internet (think corporate networks or VPN-style setups). A reverse proxy sits in front of servers — it hides your infrastructure from users.
Same underlying idea, opposite direction. Everything in this guide is the server-side kind.
Nginx Reverse Proxy Setup: Step by Step
Here's what you need before starting: an Ubuntu 22.04 or 24.04 VPS with sudo access, a backend app listening on a local port (a Node.js, Python, or PHP app — anything), and a domain with an A record pointed at your server's IP. If your app isn't deployed yet, our guide to Deploy Node.js App on Linux VPS: PM2 + Nginx Beginner Guide gets you a running backend first.
Step 1: Install Nginx
bashsudo apt update && sudo apt install nginx -y sudo systemctl enable --now nginx ## start now and on every boot
Confirm it's alive with systemctl status nginx — you want "active (running)". If UFW is enabled, open web traffic:
bashsudo ufw allow 'Nginx Full' ## opens ports 80 and 443 in one rule
Step 2: Create a Server Block With proxy_pass
The proxy_pass directive does all the heavy lifting. Here's a complete, working nginx proxy_pass example — create it as a new file at /etc/nginx/sites-available/myapp.conf rather than editing the default:
nginxserver { listen 80; server_name app.example.com; location / { proxy_pass http://127.0.0.1:3000; proxy_http_version 1.1; proxy_set_header Host $host; proxy_set_header X-Real-IP $remote_addr; proxy_set_header X-Forwarded-For $proxy_add_x_forwarded_for; proxy_set_header X-Forwarded-Proto $scheme; } }
Swap in your domain and your app's port. Then enable the site and test the syntax before touching the live service:
bashsudo ln -s /etc/nginx/sites-available/myapp.conf /etc/nginx/sites-enabled/ sudo nginx -t ## test config — never skip this sudo systemctl reload nginx ## reload, not restart: zero dropped connections
Visit your domain. If your backend is running, its response comes straight through. That's a functioning reverse proxy — the official Nginx proxy module docs cover every directive we just used if you want to go deeper.
Pro Tip: Make
nginx -ta reflex before every reload. A syntax error caught by the test costs you 5 seconds; the same error pushed to a live server takes your site down until you notice. And alwaysreloadinstead ofrestart— reload swaps in the new config with zero downtime, while restart drops every active connection.
Step 3: Understand the Headers You Just Forwarded
Without those proxy_set_header lines, your backend sees every request as coming from 127.0.0.1 — which wrecks logging, rate limiting, and geolocation. Each header has a job:
Host $host— passes the original domain, so apps serving several sites route correctly.X-Real-IPandX-Forwarded-For— carry the visitor's actual IP. The X-Forwarded-For reference on MDN explains the format in detail.X-Forwarded-Proto— tells the backend whether the visitor used HTTP or HTTPS, which matters once SSL termination enters the picture.
If your app uses WebSockets (chat, live dashboards, hot reload), add two more lines inside the location block:
nginxproxy_set_header Upgrade $http_upgrade; proxy_set_header Connection "upgrade";
HTTP/1.1 plus these Upgrade headers is what lets the connection switch protocols — miss them and WebSocket clients fail instantly with a 400 error.
Adding SSL With Certbot (HTTPS Termination)
Running plain HTTP in 2026 isn't an option, and this is where a proxy genuinely simplifies life. Instead of configuring certificates in every app, you do it once at the edge — that's the standard nginx reverse proxy SSL pattern, called SSL termination.
Certbot automates the whole thing with a free Let's Encrypt certificate:
bashsudo apt install certbot python3-certbot-nginx -y sudo certbot --nginx -d app.example.com
Certbot rewrites your server block to listen on port 443, installs the certificate, and adds an automatic HTTP-to-HTTPS redirect. Let's Encrypt certificates are valid for 90 days, and Certbot schedules the renewal for you — check it's armed with sudo certbot renew --dry-run.
One catch worth knowing: your backend still receives plain HTTP over localhost. That's fine (the traffic never leaves the machine), but some frameworks then generate http:// links or mark cookies insecure. The fix is telling the framework to trust X-Forwarded-Proto — in Express it's app.set('trust proxy', 1), in Django it's the SECURE_PROXY_SSL_HEADER setting. In our experience, this single overlooked setting explains most "redirect loop after enabling HTTPS" complaints.
Running Multiple Apps on One Server
This is where a reverse proxy earns its keep. One VPS, one IP address, as many apps as your RAM allows. There are two routing styles.
Subdomain routing (cleanest): one server block per app.
nginxserver { listen 80; server_name api.example.com; location / { proxy_pass http://127.0.0.1:8000; } } server { listen 80; server_name app.example.com; location / { proxy_pass http://127.0.0.1:3000; } }
Nginx matches the incoming Host header against server_name and routes accordingly. Add a DNS record per subdomain, run Certbot once per domain, done.
Path routing (one domain, multiple apps): different location blocks in a single server block.
nginxlocation /api/ { proxy_pass http://127.0.0.1:8000/; ## note the trailing slash } location / { proxy_pass http://127.0.0.1:3000; }
⚠️ That trailing slash is the single most misunderstood character in Nginx config. With it, /api/users reaches your backend as /users (the matched prefix is stripped). Without it, the backend receives /api/users unchanged. Neither is wrong — but your backend expects one or the other, and picking wrong produces mysterious 404s. In our experience, a huge share of "the proxy returns 404 but the app works locally" cases trace back to this one character.
This pattern scales to mixed stacks too. On Hostaccent's own production stack, Nginx sits in front and routes by path — the blog is served by a Node.js process while /clients proxies through to Apache on the same box. Nginx in front, anything behind: Node, Python, PHP-FPM, Apache, or containers. If you're running apps in containers, the same proxy_pass logic applies — see Install Docker on Ubuntu VPS: Secure Production Setup for the container side.
Insider Insight: Give every backend app a dedicated high port (3000, 3001, 8000...) bound to 127.0.0.1 only — never 0.0.0.0. If an app binds to 0.0.0.0, it's reachable directly on
your-ip:3000, silently bypassing every header, rate limit, and SSL rule your proxy enforces. It's one of the most common misconfigurations we see across the sites we host.
Common Mistakes (and How to Fix Them)
502 Bad Gateway. Nginx is fine; your backend isn't. It means the proxy couldn't reach the upstream. Check the app is actually running and listening on the port you configured: ss -tlnp | grep 3000. In the tickets Hostaccent's support team works through, a 502 that appears right after a redeploy is almost always a crashed process or a changed port — not an Nginx problem at all.
504 Gateway Timeout on slow endpoints. Nginx waits 60 seconds for the backend by default (proxy_read_timeout). Long-running report or export endpoints need it raised for that specific location, e.g. proxy_read_timeout 300s;. Don't raise it globally — slow defaults hide real problems.
413 errors on file uploads. Nginx caps request bodies at 1 MB out of the box. Uploads bigger than that die at the proxy before your app ever sees them. Set client_max_body_size 100m; (or whatever your app genuinely needs) in the server block.
Streaming and live responses stall. Nginx buffers backend responses by default, which is great for normal pages and terrible for Server-Sent Events or long-polling. Add proxy_buffering off; to the affected location only.
Wrong visitor IPs behind a CDN. If Cloudflare or another CDN sits in front of your proxy, $remote_addr becomes the CDN's IP, not the visitor's. Use Nginx's real_ip module to restore it — otherwise your rate limits throttle the CDN instead of actual abusers. Speaking of which, once the proxy works, Nginx Rate Limiting: Basic DDoS & Bot Protection is the natural next hardening step, alongside a proper Linux VPS Security Baseline (Ubuntu 24.04) in 30 Min.
And a performance note for PHP stacks: proxying to Apache or PHP-FPM has its own tuning knobs — worker counts, keepalive, and FastCGI buffers — covered in Nginx + PHP-FPM Performance Tuning on Linux VPS.
Wrapping Up: Your Setup Checklist
A working nginx reverse proxy comes down to a short list:
- One server block per app with
proxy_passpointing at a localhost port. - Forward the four headers — Host, X-Real-IP, X-Forwarded-For, X-Forwarded-Proto — plus Upgrade/Connection for WebSockets.
- Terminate SSL at the proxy with Certbot; teach the framework to trust
X-Forwarded-Proto. - Bind backends to 127.0.0.1, never 0.0.0.0.
- Test with
nginx -t, deploy withreload— every single time.
Honest trade-off: yes, a proxy adds a hop. Over localhost that overhead is typically a millisecond or two — a price worth paying for the security and flexibility you get back. What actually hurts performance is a starved server underneath it, which brings us to the last point.
Want a VPS That's Ready for This?
Everything in this guide assumes root access — shared hosting won't let you near an Nginx config. If you're shopping for a box to practice on (or to run real projects), Hostaccent's Linux VPS hosting Basic plan runs $7.99/mo and renews at the same $7.99/mo — no renewal-price ambush — on NVMe SSD storage with UK-based human support, from a UK-registered company operating since 2012. Fair warning: a VPS is self-managed territory, so you handle the configs yourself (this guide is your map). If you'd rather never open a terminal, a VPS isn't the right buy — but if you've read this far, you're clearly not that person.
Frequently Asked Questions
What's the difference between a reverse proxy and a load balancer?
A load balancer is a reverse proxy with a specific job: spreading traffic across several backend servers. Every load balancer is a reverse proxy, but a reverse proxy serving one backend isn't load balancing. In Nginx, you upgrade one into the other by adding an upstream block with multiple servers.
Do I need Apache if I use an Nginx reverse proxy?
No — Nginx can serve apps directly. But the Nginx-in-front-of-Apache pattern is still common and useful: Apache handles .htaccess files and legacy PHP apps while Nginx handles SSL, static files, and buffering. Many hosting stacks (ours included) run exactly this combination in production.
How do I fix a 502 Bad Gateway on my proxy?
Check three things in order: is the backend process running (ss -tlnp), does the port in proxy_pass match the port the app listens on, and is the app bound to 127.0.0.1 rather than crashed on startup? The Nginx error log (/var/log/nginx/error.log) names the exact upstream it couldn't reach.
Can Nginx proxy WebSocket connections?
Yes, but not by default. You must set proxy_http_version 1.1; plus the Upgrade and Connection "upgrade" headers in the location block. Without them, WebSocket handshakes fail with 400/426 errors even though normal HTTP requests through the same proxy work fine.
Does a reverse proxy slow my site down?
Marginally — typically a millisecond or two per request over localhost, which no visitor will ever perceive. In practice most sites get faster, because Nginx buffers slow clients, serves static files directly, and can cache responses, all of which reduce load on the application behind it.
How small a VPS can run this setup?
Smaller than most people think. Nginx itself idles at under 20 MB of RAM; your backend apps are what consume memory. A 2 GB RAM VPS comfortably runs Nginx plus two or three modest Node.js or Python apps — Hostaccent's entry VPS plans handle this exact workload for customers every day.
Should the backend connection also use HTTPS?
Over localhost, no — the traffic never touches a network, so plain HTTP to 127.0.0.1 is standard practice. If the backend lives on a different machine across an untrusted network, then yes: proxy with proxy_pass https:// and verify certificates, or tunnel the traffic privately.

![Terminal screenshot showing nginx won't start with nginx: [emerg] error and the nginx -t config test command in 2026](/blog-images/posts/nginx-wont-start.webp?v=1782665447625)





Discussion
Have a question or tip about this topic? Share it below — your comment will appear after review.